Here we leave a small list of basic tips modeling, we hope to help you in your growth and development as a 3D artist.
While this post is armed from the perspective of 3ds Max, everything mentioned here is equally valid for any other modeling application, such as Maya, Cinema 4D or Blender.
Click on the images to view them in their original size.
Someone once said there everything is already invented, and partly true, every time we try to create something we do is basically reinterpret, improve or modify an existing thing; We never put together from scratch.
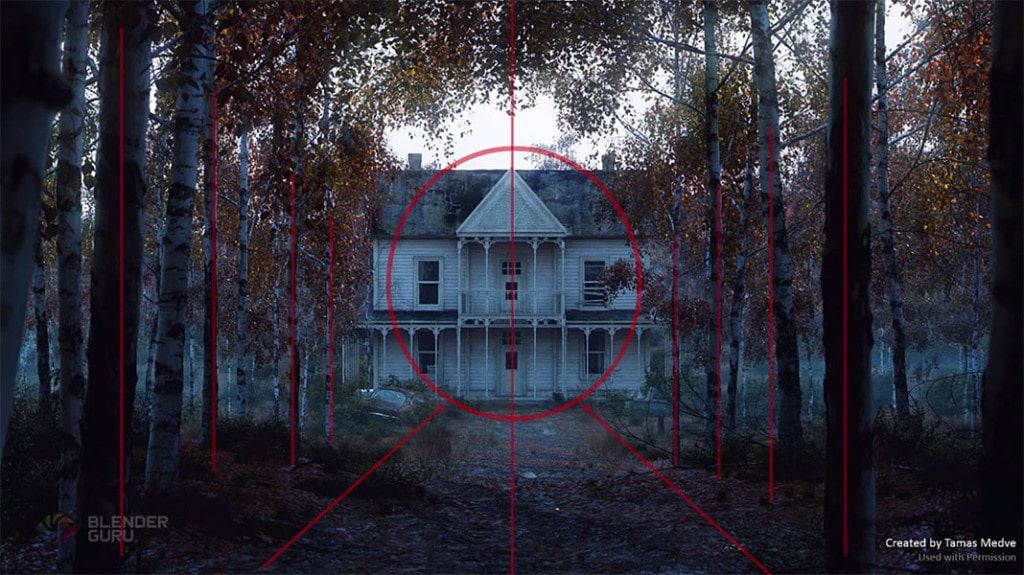
Great artists always use references, because it is thanks to this they can see how a particular surface to light, how a joint is moved or how the different proportions of an object behaves relate.
Remember, whenever you go to model something, either a character, a vehicle, a piece of furniture or a building, create a folder, and collects images, photographs, diagrams or videos to help you better understand what you want to play. It is the only way to know what you’re doing is right on track.
The key to success lies in the comparison.

Before you start modeling, it takes a few minutes to think about the most efficient way to achieve your objective.
Depending on what you want to do, you can always use one of the following methods of modeling:

Creating a Spline which is then rotated using the Lathe Modifier to generate volume.

Generating volume from a circular surface, edges and extruding successively climbing the vertices.

Modeling from a cylinder, subdivided and converted into Editable Poly, which is subsequently scaled vertices using the “Soft Selection” tool.

Again a cylinder, which is modified by using Modifiers, in this case, the FFD Modifier, which allows deforming geometry based on a dot matrix.
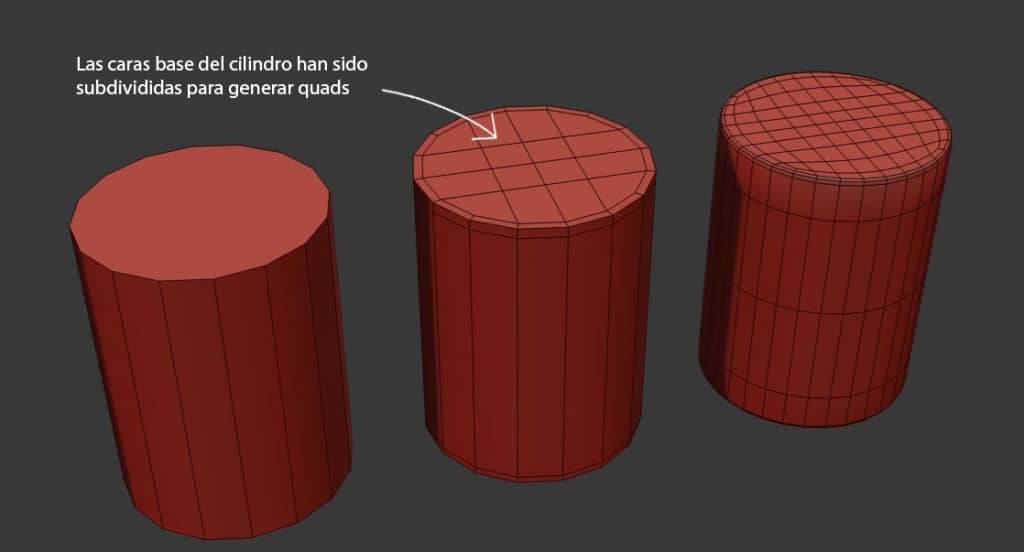
always try to model in quads base.
Quads, or 4 edges polygons are your best ally to keep your geometry clean and adaptable.
Unlike the tris and the n-grads (triangles and polygons of more than 4 edges), the quads allow freely modify the geometry of an object, being able to apply displacements, smoothing algorithms (Turbosmooth, meshsmooth, or similar) and uvw unwraps without errors.
While this is not as important for architectural modeling, it is life or death for the modeling of characters and vehicles.
Try to avoid the T-vertices (vertices union “T”), as they often give rise to tris and n-grads, and watch special meetings of more than four edges.


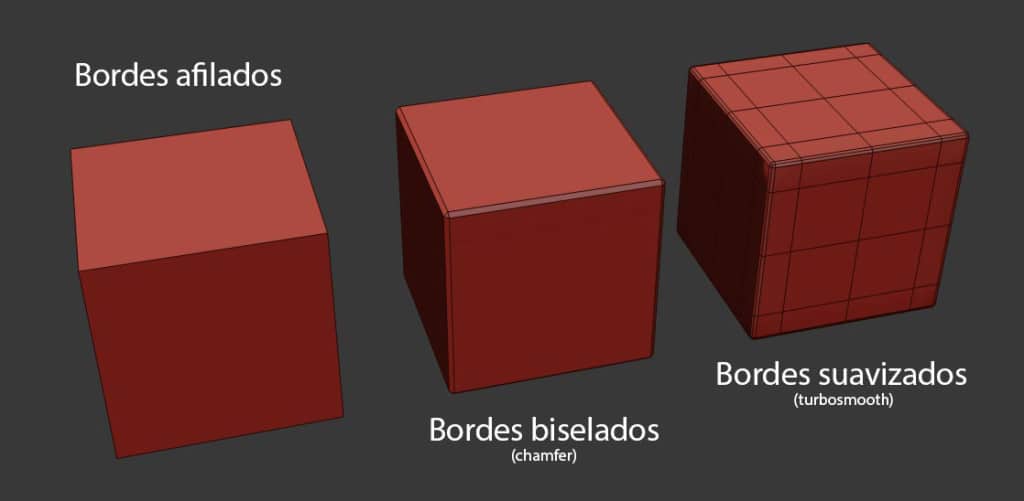
It is always better to go from strength to strength.
Whenever you should modeling complex, is start with the basics, for example, a cylinder 16 faces. Try using subdivision values that allow you to generate quads: 4, 8, 12, 16, 24, 32 …
When you need to soften, used swift loops (or edge loops in Maya) to give more detail to the edges before applying smoothing algorithms.
In the real world nothing it is 100% sharp, not even at the molecular level.
Remember, whenever you need to model attempts to include a bevelled edges, either by smoothing algorithms, as Turbosmooth or meshsmooth, or simply with a chamfer.
This has the following plus: when rendering, you will shine and reflection on these edges, which add an additional fee to the realism of your images.
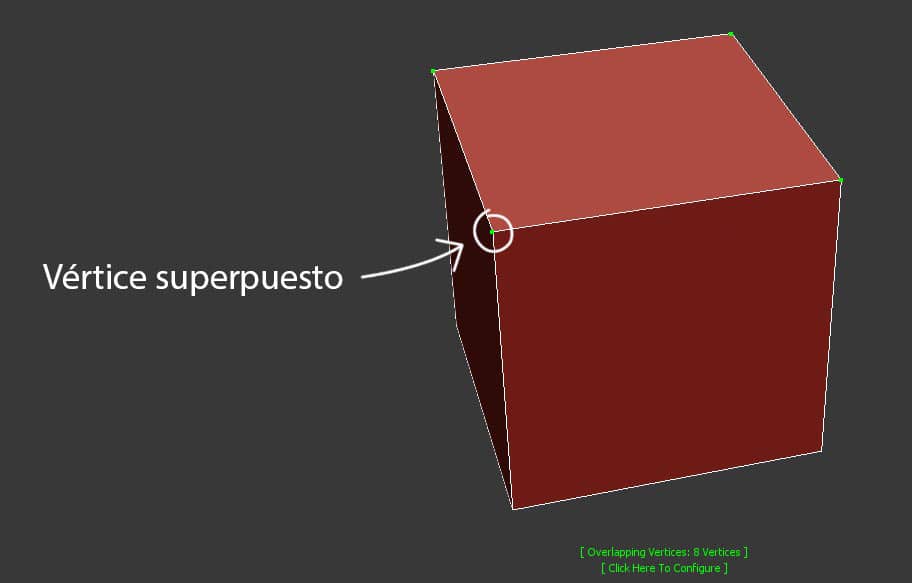
Weld uses tools like 3ds Max, or Maya Merge Vertex Tool, to make sure your geometry vertices are really soldiers, and you do not have overlapping vertices.
Fret to check this when you integrate geometry from other applications.
In 3ds Max you can use the tool xView. To activate press the “X” key, then type “xview” and hit Enter. Click on the green text that appears on the screen and select the “Overlapping Vertices” (overlapping vertices) option.Duplicate vertices will be indicated on the screen.
This is especially important if you plan to print your 3D models.
If you have more than once had problems with the display of your textures, it is probably because some of the faces of your model is reversed.
To ensure that the polygons have the proper orientation should review the “normals” (in 3ds Max is corrected with the “Flip” option in the Modify> Polygon> Polygon Edit> Flip tab).
The “normals” define the front side with respect to the rear in the polygons.
In the world of 3D surfaces of the objects they have a single orientation, since they are generally used to construct volumetric meshes (which is not seen inside); remember that everything has thick, even something as thin as a sheet of paper.
The role of normals is tell the program which of the two sides of the same polygon is to be rendered, in order to avoid making unnecessary calculations.
Despite this, it is always possible to tell the application deployment both sides, but this is usually made from rendering engines.
In the case of V-Ray there 2SidedMtl, widely used for simulating curtains from a plane without thickness.

If you liked this post, help us spread the word by sharing it with your friends;)
Source: ejeZeta